
Ascending the 100-floor Spire requires synchronized cooldowns, team DEF stacking, and counter-picking monarch mechanics. Review the dossiers below before entering the portal.

Welcome to the Tower Spire! Form a 3-player party and watch out for catastrophic Monarchs every 10 floors!
Overview
What is the Tower Dungeon?
The Tower Dungeon is a real-time multiplayer (co-op) combat challenge. You and up to two friends can form a squad, bringing 3 animals each, to battle through 100 floors of scaling difficulty. Unlike standard turn-based battles, the tower operates on a rapid 250ms tick rate, where cooldowns, buffs, and damage happen in real time.
DIMENSIONAL STATUS: TOWER BREACH SYNCHRONIZED

Squad Based
Join solo or with up to 2 other players for a total of 9 animals.

Real-Time Combat
Action buttons are based on cooldowns, not turns.

Team Synergies
Defend grants a shield to your active animal equal to total DEF of your alive team.
Unique Bosses
Every 10 floors features a unique boss with special mechanics.

How It Works
The basics of starting and progressing through the tower.
Create or Join
Create or join an existing run via the Lobby UI.
Select Animals
Choose 3 animals from your inventory. They will be your party for the duration of the run.
Climb the Floors
The leader initiates battles. Clear all enemies to advance. Animals revive at full HP between floors.
Checkpoints & Wipes
Checkpoints occur at floors 1, 11, 21, etc. If your entire squad dies, you wipe and return to the last checkpoint.Wiping incurs a 6-hour cooldown.
Inactivity Timeout
If no player takes action for 5 minutes during a battle, the run automatically fails.
Floor Progression
Enemy scaling and danger bands across the 100 floors.
| Floor Range | Danger Level | Enemy Count | Spawn Pool |
|---|---|---|---|
| 2–9 | Very Low | 2–3 | Tier 1 |
| 12–19 | Low | 2–3 | Tier 1–2 |
| 22–29 | Medium | 2–3 | Tier 2 |
| 32–39 | High | 2–3 | Tier 2–3 |
| 42–49 | Very High | 2–3 | Tier 3 |
| 52–59 | Extreme | 2–3 | Tier 3–4 |
| 62–69 | Extreme | 1–3 | Tier 4 |
| 72–79 | Insane | 1–2 | Tier 4–5 |
| 82–89 | Insane | 1–2 | Tier 5 |
| 91–92 | Catastrophic | 1–2 | Tier 5 + Monarchs (15%) |
| 93–96 | Catastrophic | 1–2 | Monarchs (45%) + Tier 5 |
| 97–99 | Catastrophic | 1–2 | Monarchs (65%) + Tier 5 |

Creature Bestiary
Standard enemies you'll face on your climb. Stats shown are base values at floor 1; they scale logarithmically as you climb.
Tier 1 (Fodder)
| Creature | Role & Threat | Base Stats | Abilities |
|---|---|---|---|
 Skeleton Undead | minionVery Low | HP: 1000 ATK: 150 DEF: 40 SPD: 10 | • Bone Slash (1.0x) |
 Zombie Undead | minionVery Low | HP: 1200 ATK: 160 DEF: 50 SPD: 6 | Pass: Plague Touch: -10% DEF 8s • Rotting Bite (1.0x) • Plague Touch (-10% DEF) |
 Goblin Monster | speedLow | HP: 1000 ATK: 180 DEF: 30 SPD: 22 | Pass: Dirty Trick: -15% SPD 6s • Quick Stab (1.0x) • Dirty Trick (-15% SPD) |
 Giant Toad Animal | tankVery Low | HP: 1500 ATK: 155 DEF: 60 SPD: 8 | Pass: Swallow: 1.6x damage • Tongue Lash (1.0x) • Swallow (1.6x) |
 Sabertooth Animal | fighterLow | HP: 1200 ATK: 200 DEF: 35 SPD: 20 | Pass: Frenzy: 2 attacks in 1 action • Claw (1.0x) • Frenzy (0.7x ×2) |
 Ghoul Undead | fighterLow | HP: 1100 ATK: 190 DEF: 35 SPD: 16 | Pass: Devour: heals 25% of damage • Rend (1.0x) • Devour (1.3x + 25% lifesteal) |
 Phantom Undead | speedLow | HP: 1000 ATK: 170 DEF: 25 SPD: 28 | Pass: Phase Shift: dodge next attack • Soul Touch (1.0x) • Phase Shift (dodge 3s) |
Tier 2 (Elites)
| Creature | Role & Threat | Base Stats | Abilities |
|---|---|---|---|
 Parasyte Monster | speedMedium | HP: 1800 ATK: 350 DEF: 60 SPD: 26 | Pass: Infest: 3% maxHP/s for 6s • Latch On (1.0x) • Infest (3% HP DOT) |
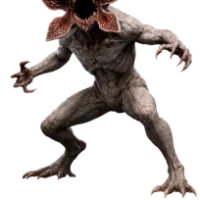 Demogorgon Monster | fighterMedium | HP: 2500 ATK: 400 DEF: 80 SPD: 18 | Pass: Screech: -15% ATK (AoE) 8s • Petal Jaw (1.0x) • Screech (-15% ATK AoE) • Pounce (1.7x) |
 Troll Monster | tankMedium | HP: 3000 ATK: 320 DEF: 100 SPD: 8 | Pass: Regenerate: +10% HP over 8s • Club Smash (1.0x) • Regenerate (+10% HP) |
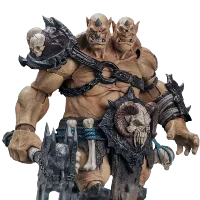 Ogre Monster | fighterHigh | HP: 2800 ATK: 450 DEF: 90 SPD: 10 | Pass: Heavy Swing: 1.8x damage • Ground Slam (1.0x) • Heavy Swing (1.8x) |
 Hollow Undead | casterMedium | HP: 2000 ATK: 380 DEF: 50 SPD: 20 | Pass: Sonido: +30% SPD 6s • Cero (1.0x) • Sonido (+30% SPD) |
 Black Minotaur Monster | tankHigh | HP: 3500 ATK: 420 DEF: 120 SPD: 12 | Pass: Fortify: +25% DEF 10s • Gore (1.0x) • Bull Charge (2.0x) • Fortify (+25% DEF) |
Tier 3 (Veterans)
| Creature | Role & Threat | Base Stats | Abilities |
|---|---|---|---|
 Devander Monster | fighterHigh | HP: 4000 ATK: 550 DEF: 100 SPD: 22 | Pass: Rage Burst: 2.2x damage • Devastating Strike (1.0x) • Rage Burst (2.2x) • Weaken (-20% DEF) |
 Jaw Titan Monster | tankHigh | HP: 5500 ATK: 500 DEF: 150 SPD: 10 | Pass: Harden: +40% DEF 10s • Jaw Crush (1.0x) • Harden (+40% DEF) • Titan Bite (2.0x, 30% pen) |
 Gyutaro Monster | speedHigh | HP: 3800 ATK: 600 DEF: 80 SPD: 30 | Pass: Poison Blood: 4% maxHP/s 6s • Blood Sickle (1.0x) • Rotating Blood Slash (1.5x AoE) • Poison Blood (4% DOT) |
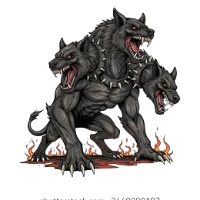 Cerberus Monster | fighterHigh | HP: 4500 ATK: 580 DEF: 100 SPD: 20 | Pass: Nullify enchantments 5s • Triple Bite (1.0x) • Flame Bite (1.8x) • Nullify (lock enchants) |
 Siren Head SCP | casterVery High | HP: 5000 ATK: 520 DEF: 90 SPD: 14 | Pass: Siren Call: -25% SPD (AoE) • Sonic Blast (1.0x) • Siren Call (-25% SPD AoE) • Reality Distortion (-20% ATK AoE) |
 Slenderman SCP | casterVery High | HP: 4800 ATK: 480 DEF: 70 SPD: 24 | Pass: Static Field: stun 2.5s • Tendril Grasp (1.0x) • Static Field (stun 2.5s) • Teleport (dodge 4s) |
Tier 4 (Champions)
| Creature | Role & Threat | Base Stats | Abilities |
|---|---|---|---|
 Nomu Monster | tankVery High | HP: 7000 ATK: 650 DEF: 180 SPD: 16 | Pass: Shock Absorb: 30% reflect 8s • Shock Absorption Smash (1.0x) • Shock Absorb (30% reflect) • Hyper Smash (2.2x AoE) |
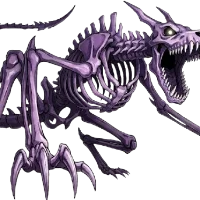 Juggernaut Monster | tankExtreme | HP: 9000 ATK: 700 DEF: 200 SPD: 8 | Pass: Charge: 2x next attack • Unstoppable Crush (1.0x) • Juggernaut Charge (2x next) • Earthquake (1.6x AoE) |
 Menos Grande (Gillian) Undead | casterExtreme | HP: 8000 ATK: 750 DEF: 140 SPD: 10 | Pass: Negación: -40% healing (AoE) • Gran Cero (1.0x) • Negación (-40% healing AoE) • Spirit Devour (2.0x + 30% lifesteal) |
 Kraken Animal | fighterExtreme | HP: 8500 ATK: 720 DEF: 160 SPD: 12 | Pass: Maelstrom: 1.8x AoE • Tentacle Slam (1.0x) • Constrict (-35% SPD) • Maelstrom (1.8x AoE) |
Tier 5 (Kaiju)
| Creature | Role & Threat | Base Stats | Abilities |
|---|---|---|---|
 Kaiju No. 9 Kaiju | fighterInsane | HP: 12000 ATK: 900 DEF: 200 SPD: 22 | Pass: Forced Evolution: +30% ATK 12s • Mimicry Strike (1.0x) • Forced Evolution (+30% ATK) • Annihilation Beam (2.5x AoE) |
 Elder Centipede Kaiju | tankInsane | HP: 15000 ATK: 800 DEF: 250 SPD: 14 | Pass: Exoskeleton Molt: +50% DEF 10s • Burrow Strike (1.0x) • Exoskeleton Molt (+50% DEF) • World Serpent Devour (2.0x, 40% pen) |
 Orochi Kaiju | casterInsane | HP: 13000 ATK: 850 DEF: 180 SPD: 18 | Pass: Multi-Head: 3 attacks in 1 • Flame Breath (1.0x) • Multi-Head Assault (1.2x ×3) • Terror Aura (-25% ATK AoE) |
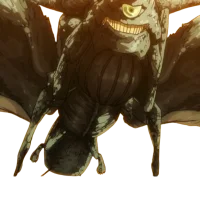 Charybdis Kaiju | fighterInsane | HP: 14000 ATK: 870 DEF: 190 SPD: 16 | Pass: Abyssal Drain: 5% maxHP/s AoE • Vortex Pull (1.0x) • Tsunami (2.0x AoE) • Abyssal Drain (5% DOT AoE) |
Monarchs
Catastrophic-level threats that only spawn on floors 90-100.
Monarchs possess incredibly high base stats and devastating AoE attacks. They bypass normal spawning rules and appear as solo threats in the highest floors.
| Creature | Role & Threat | Base Stats | Abilities |
|---|---|---|---|
 Baran Monarch of White Flames Monarch | fighterCatastrophic | HP: 20000 ATK: 2200 DEF: 300 SPD: 24 | Pass: Breath of Destruction: 2.5x AoE • White Flame (1.0x) • Breath of Destruction (2.5x AoE) • Dragon Fear (-30% ATK AoE) |
 Rakan Monarch of Fangs Monarch | fighterCatastrophic | HP: 22000 ATK: 2400 DEF: 280 SPD: 28 | Pass: Beast Rampage: 2 hits at 1.8x • Fang Strike (1.0x) • Beast Rampage (1.8x ×2) • Predator Instinct (+40% SPD) |
 Sillad Monarch of Frost Monarch | casterCatastrophic | HP: 18000 ATK: 2000 DEF: 250 SPD: 20 | Pass: Absolute Zero: -50% SPD AoE • Frost Lance (1.0x) • Absolute Zero (-50% SPD AoE) • Blizzard (2.0x AoE) |
 Tarnak Monarch of Iron Body Monarch | tankCatastrophic | HP: 28000 ATK: 1800 DEF: 400 SPD: 12 | Pass: Iron Fortress: +60% DEF 12s • Iron Fist (1.0x) • Iron Fortress (+60% DEF) • Seismic Slam (2.0x AoE, 30% pen) |
 Legia Monarch of the Beginning Monarch | casterCatastrophic | HP: 20000 ATK: 2100 DEF: 260 SPD: 22 | Pass: Origin Wipe: -50% healing AoE • Genesis Bolt (1.0x) • Origin Wipe (-50% healing AoE) • Primordial Blast (2.8x) |
 Querehsha Monarch of Plagues Monarch | casterCatastrophic | HP: 19000 ATK: 2000 DEF: 240 SPD: 20 | Pass: Pandemic: 6% maxHP/s AoE • Plague Touch (1.0x) • Pandemic (6% DOT AoE ×2 stacks) • Decay Aura (-35% DEF AoE) |
 Yogumunt Monarch of Transfiguration Monarch | fighterCatastrophic | HP: 21000 ATK: 2300 DEF: 270 SPD: 26 | Pass: Reality Rend: ignore 50% DEF • Transfigure Strike (1.0x) • Morph (+50% ATK) • Reality Rend (2.5x, 50% pen) |
Boss Encounters
Major roadblocks encountered every 10 floors.
Floor 10: SCP-173
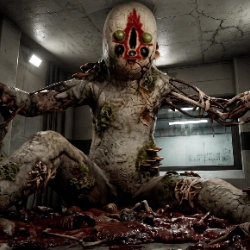
Floor 20: The Clicker
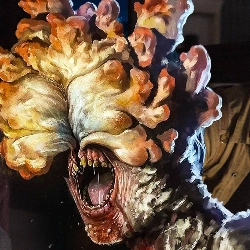
Floor 30: Nemesis

Floor 40: SCP-096

Floor 50: Time Lag Warden

Floor 60: Mirror Doppelganger
Floor 70: The Illusionist
Floor 80: Puppet Master
Floor 90: Mahoraga
Floor 100: The Scarlet King
Floor Modifiers
Special effects applied based on the floor number.
None
No modifier
Haste
Enemies +20% SPD
Toxic
All units take 1% HP/5s
Mana Void
Mana regen disabled
Volatile
+15% crit chance for all
Blighted
Healing effectiveness -30%
Fortified
Enemies +25% DEF
Empowered
Enemies +20% ATK
Combat Mechanics
Understanding the real-time action resolution system.
Action Priority
Because the combat resolves every 250ms, actions are queued and executed in a strict priority order. If two players queue actions at the exact same tick, the system resolves them based on priority, then speed.
- Defend (Priority 1) - Shields are applied instantly to mitigate incoming attacks.
- Heal & Heal Ally (Priority 2) - Healing occurs before damage.
- Potions & Enchants (Priority 3) - Buffs and debuffs apply next.
- Attack (Priority 4) - Damage is calculated and applied last.
Team Attacks
When you use the Attack action, the damage is calculated using the combined ATK of ALL alive animals in your team. Lifesteal is applied based on the total damage and heals the active animal.
Team Defend
The Defend action applies a temporary shield equal to the combined DEF of ALL alive animals in your team. Shields absorb incoming damage before your active animal's HP is affected. Shields are cleared at the end of each floor.
Potions & Shop
Items available during your climb. You can access the shop in safe zones (every 10 floors after the boss).
Boss Counter Potions
Potion of Deep Focus
400 CoinsMaintain sight — counters SCP-173 and Puppet Master
Potion of Stealth
400 CoinsStealth mode — counters The Clicker
Potion of Mind Sight
500 CoinsSee through mind — counters SCP-096
Potion of Speed
300 CoinsReduces all cooldowns by 2s
Shop Items
Lvl 1 Healing Orb
Heals +500 HP
Lvl 2 Healing Orb
Heals +1,000 HP
Lvl 3 Healing Orb
Heals +2,000 HP
Lvl 1 Barrier
50% dmg reduction 5s
Lvl 2 Barrier
50% dmg reduction 10s
Lvl 3 Barrier
50% dmg reduction 15s
Lvl 1 Resurrection Staff
Revive animal at 25% HP
Lvl 2 Resurrection Staff
Revive animal at 50% HP

Rewards
Earn Tower Tokens to spend in the exclusive Tower Shop.
Tower Tokens
Tower Tokens are earned for every floor cleared. Boss floors grant 3x the normal amount. Tokens scale exponentially as you climb higher. The formula is:Tokens = 50 + (Floor × 20) + (Floor / 5)²
Milestone Boss Bonuses
Rare Drops
Starting from higher floors, there is a small chance to receive rare drops upon clearing a floor. The chances increase as you climb.
- • Gem Shards (Highest drop rate)
- • Enchantment Scrolls (Medium drop rate)
- • Evolution Stones (Very rare)
Strategy Guide
Tips and tricks for climbing the tower.
Team Composition is Key
Because Team ATK and Team DEF are combined, you don't necessarily need a balanced team per player. Instead, a squad of 3 players can coordinate: one player brings high ATK animals, another brings high DEF tanks, and the third brings healers.
Communication During Bosses
Bosses from Floor 60 onwards require extreme coordination. If one person attacks the Mirror Doppelganger, the whole team will likely wipe. If you don't coordinate burst damage on Mahoraga (Floor 90), it will regenerate forever. Use voice chat or be very communicative in the game chat.
Manage Your Safe Zones
Safe zones appear after every boss (Floors 11, 21, 31, etc.). These also act as checkpoints. Before fighting the boss on Floor 10/20/etc., make sure everyone understands the mechanics. If you wipe, you only go back to the start of the current block of 10 floors.
Prioritize Defend
Because Defend has a priority of 1 (executes before attacks) and applies a shield equal to your ENTIRE alive team's DEF, it is the strongest mitigating tool in the game. Have one player dedicate themselves to spamming Defend when boss abilities are incoming.